
RV Bathroom Update
The final project in our RV renovation (for now): the bathroom. We put this off until last, because it’s such a small space we didn’t know exactly what to do with it, how to do it, or how we were going to fit in there to do it. We still have some final touches to add, but we’re really happy with how it has turned out so far.
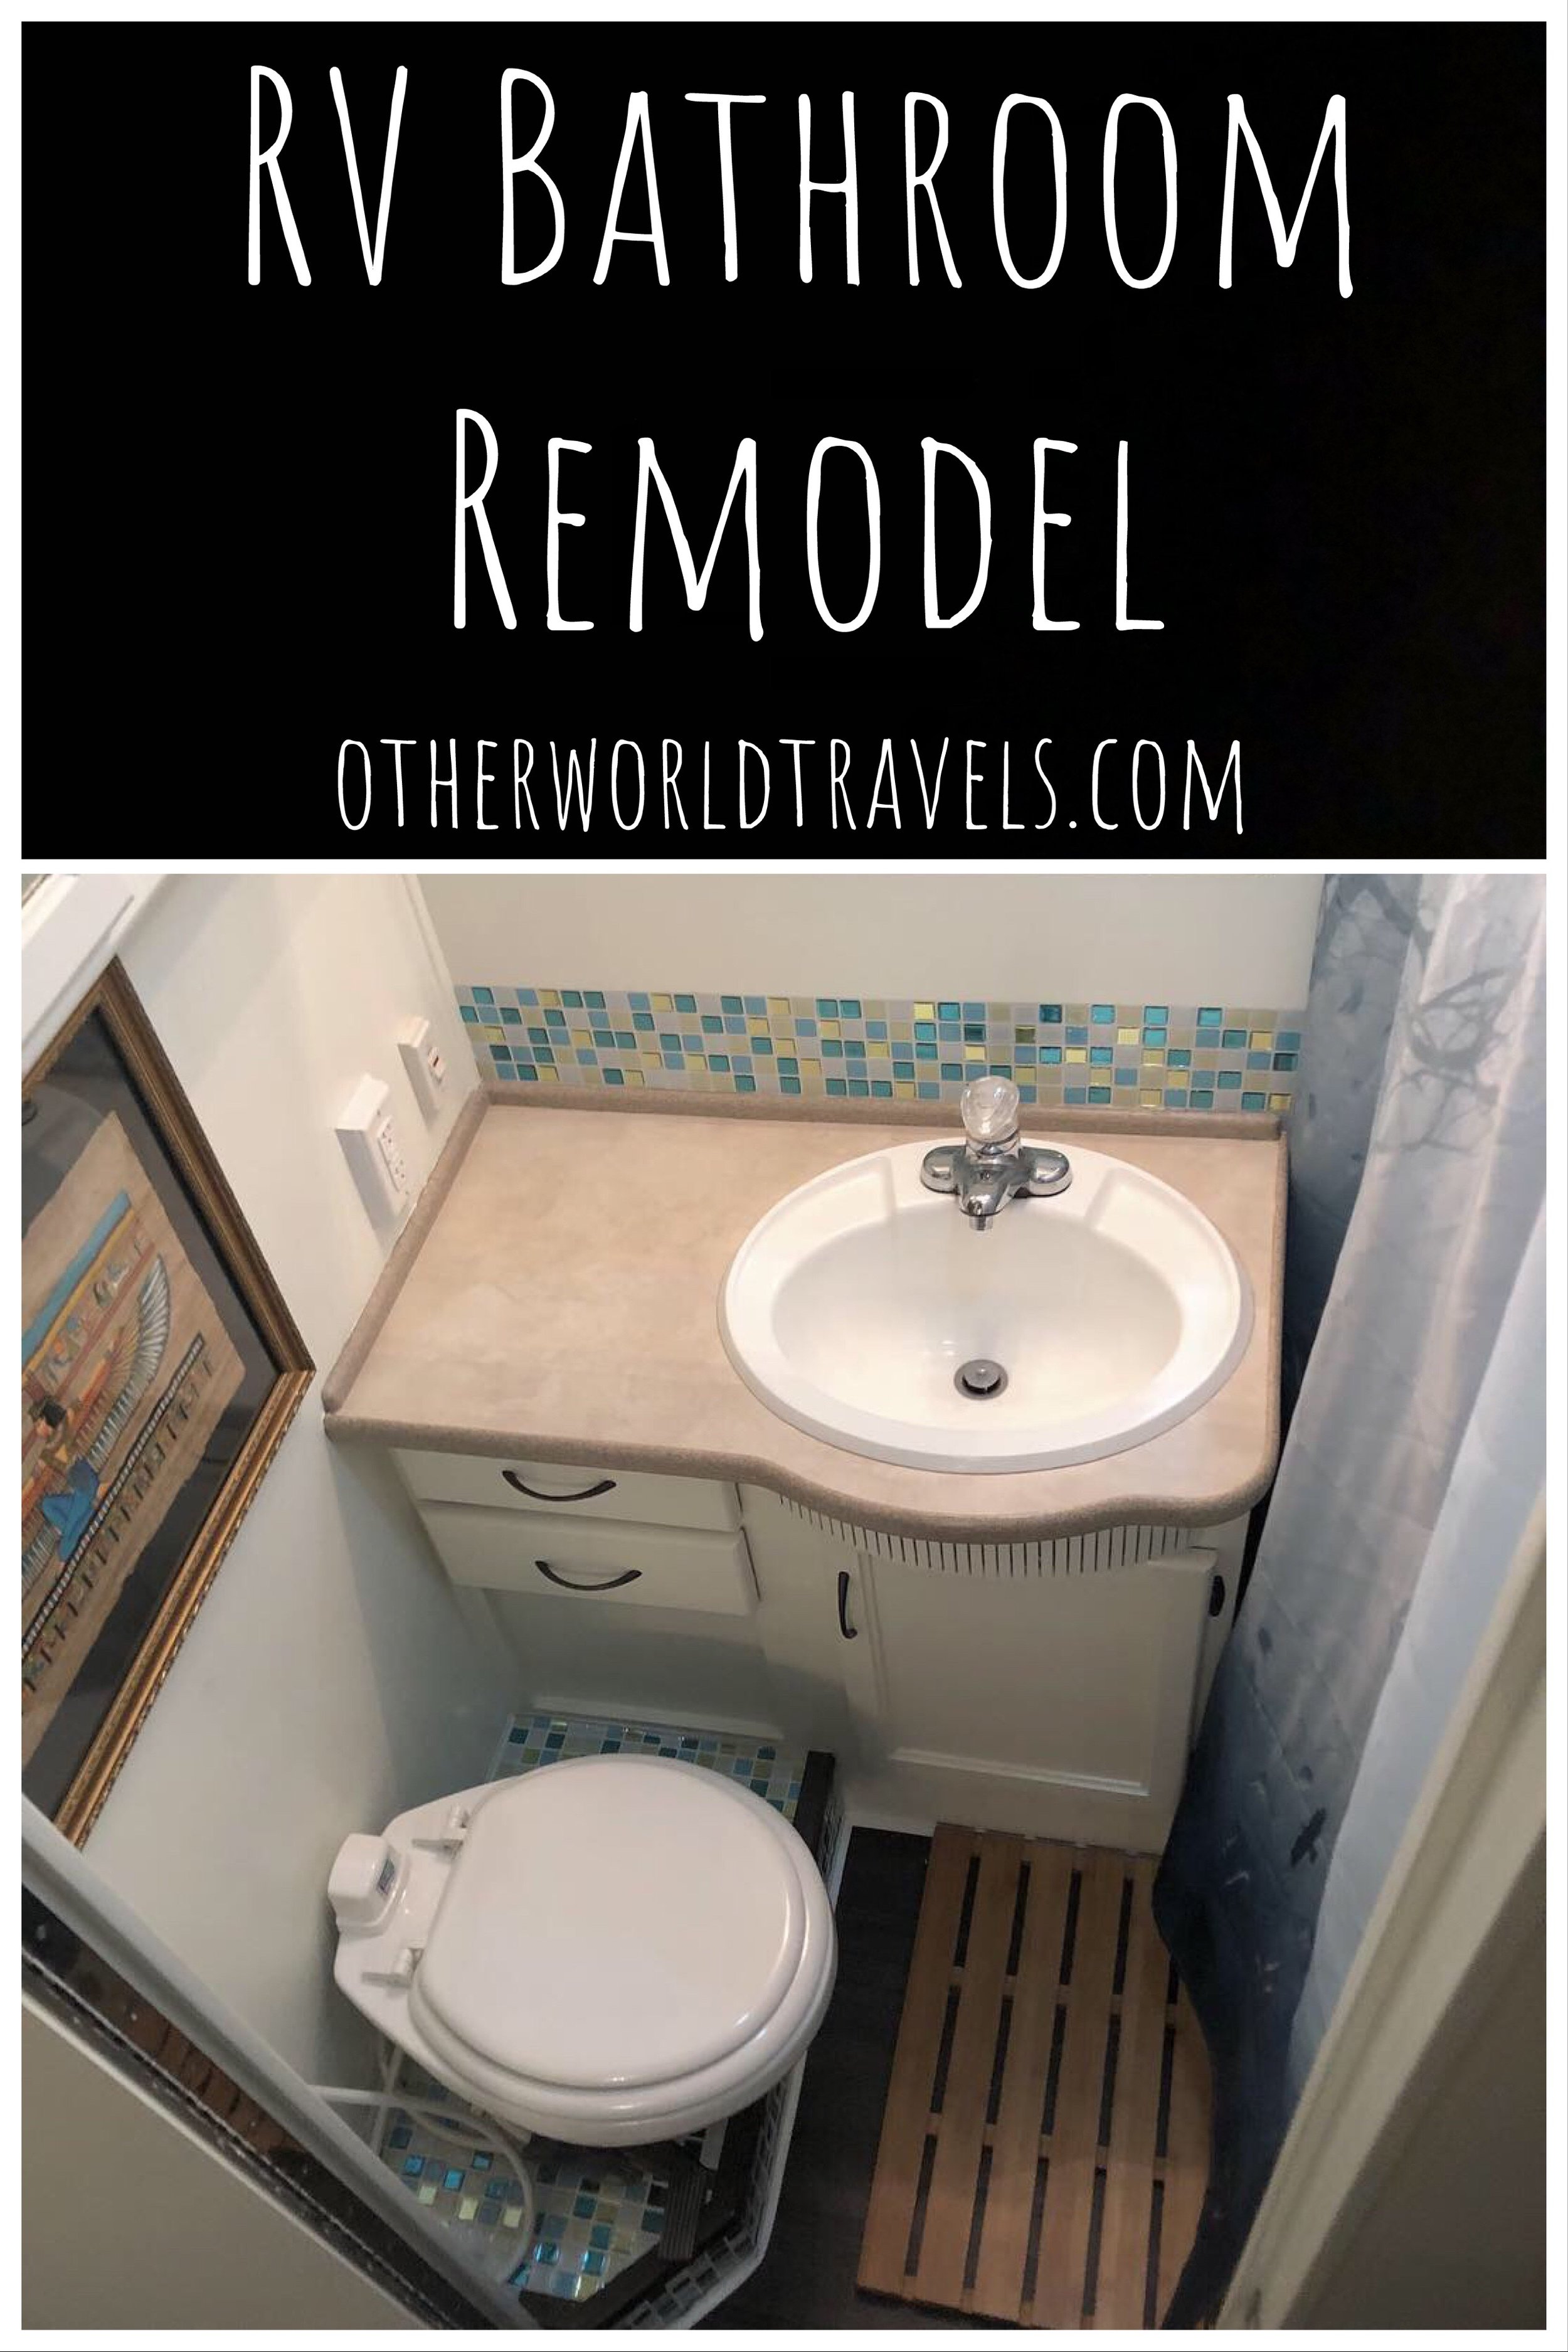
We have some exciting plans in the making for a composting toilet, but that is for a later post. For now, we’re tackling paint, back splash, flooring, and our shower doors.
Paint
We went with this Behr Premium Plus Semi-Gloss in Atrium White for the walls and cabinets. We also used one coat of Gripper Primer on everything. For all of the how-to details and prep work of our painting adventure, click here. The only difference in painting the bathroom was keeping the humidity down. We kept our dehumidifier right by the door while painting and for the dry time.
We painted our hardware using Rust-Oleum Hammered Amber. After scuffing up the surface a bit, we used a 50:50 mix of vinegar and water to clean the hardware. After the vinegar dried, we spray painted two coats onto the hardware and let it sit overnight. It works pretty well, although it doesn’t last forever. We’ve seen some chips already, but it’s not bad enough to replace yet. One of the perks in getting the “Hammered” paint is that little blemishes look fine. This paint also worked well on the pedal and base of our toilet, which had been discolored from the many foot flushes (picture below).


Shower Doors
After going back a forth on whether or not we wanted to keep the doors on the shower, we finally decided to get rid of them. Actually, Loren ripped them out in frustration while painting the walls. No loss there, these things got really gross and we were tired of cleaning them.
The doors are not difficult to remove, but they are heavier than they look! After unscrewing the metal sides, all the parts pretty much just pop off (with a little muscle). The top piece slides off, then you can lift the doors up and out. Ours were attached to each other, which is why they were so heavy.
Once the doors were gone, the metal sides and base can be removed. We took the screws out and used a scraper to pry them up. The sides and base were attached with silicone. This can be removed with Goo Gone or just a scraper.
We replaced the shower doors with this shower curtain , which is 48”x72”. We got a cheapo tension rod from Wal-Mart and painted it bronze to match the harware.
Flooring
We went with Allure Vinyl Flooring in Iron Wood for most of the RV, including the bathroom. This stuff is pretty good, although we’ve had our hangups. You can read all about our flooring install here. It’s been great in the bathroom - no damage from moisture at all. We also opted to keep the laminate that was originally installed. Since the floor we put in is floated, we just installed it right over the vinyl, which acts as an extra water-proof layer.
Back Splash
Our favorite (and easiest) part of the bathroom remodel was this Tic-Tac Tiles backsplash in Glassy Peacock. These were super easy to install - just peel and stick. They are anti-mold, anti-bacterial, easy to clean, very sturdy once stuck on, and make the bathroom look so snazzy! We first put them on the step around the toilet, over the original vinyl floor. After our paint on the walls had cured completely (30 days), we added back splash to the wall behind the sink.
There you have it! This is the final (for now) look. What do you think? Are you remodeling an RV? Leave us a comment below!
